Mid-winter update incl. asparagus and witch hazel

Mid-to-late January in Portland is when many of the popular garden plants begin to awaken for Spring. Winter daphne buds appear and may even begin to open. The buds on the magnolias plump under the grey skies, and winter-flowering bushes like Hamamelis (witch hazel) and Edgeworthia (Chinese paper bush) begin to add new color to the garden.

Hamamelis var. Aphrodite, just beginning to unfurl its flame-colored petals

Hamamelis var. Aphrodite, just beginning to unfurl its flame-colored petals

This is the beginning of our second year in this garden. After making a big push to get our front yard full and planted last spring (we felt we had something to prove after baffling our lawn-loving neighbors by ripping up the fresh sod), this year we are pivoting to focus on the back yard. Since my last post we had arborists come and clean up the mature cherry, the baby cherry, and the winter holly that thrives along the back fence. This gave us more light and a large pile of wood chips. We did the classic no-dig weed suppression method of cardboard covered with these chips in mid November, and then waited out the shortest days of late fall and early winter.

Edgeworthia chrysantha var. Akebono

Edgeworthia chrysantha var. Akebono

Now, as the sun creeps further over the yard and lingers longer in the afternoon, we are adding to the back yard. Our goals for the back yard are native plants that provide shelter and/or food for birds. In addition, we are tucking in a few plants that provide food for us!

Asparagus

I have long dreamed of having an asparagus patch of my own, and so when the email came from Portland Nursery that asparagus is in and ready to be planted, we hopped in the car.

Handy chalkboard reference posted over the asparagus crowns at Portland Nursery

Handy chalkboard reference posted over the asparagus crowns at Portland Nursery

Portland Nursery asparagus pamphlet (link)

I didn’t really know what the asparagus would look like in plantable form. A bulb? A tiny green spear? I was surprised to find that it looked like a cross between a clod of dirt and one of those tentacled villain robots from The Matrix

Matrix sentinel image from kehlan on Deviantart

Matrix sentinel image from kehlan on Deviantart

Following the instructions on the chalkboard, I dug three holes and planted the three crowns. (I was too lazy to dig the suggested trench). We got one of each variety from Portland Nursery. Apparently asparagi have sexes because you can get all male (better for eating, but won’t reproduce or spread), all female, or a mix.

Tag descriptions:

Sweet Purple: Male + Female, purple spears, sweet, 8-week harvest

Mary Washington: Female, high yield, 6-week harvest, uniform long thick shoots

Jersey Knight: Male, large green spears, easy care, high yield, rot and rust resistant

Each crown was $1.99.

Planted them in an L formation with the Sweet Purple at the elbow, the Mary Washington on the East leg and the Jersey Knight on the North leg. Interestingly, the all female one was smaller and daintier than the others…probably just a coincidence.

Other mid-winter plantings

We started with some good, classic Oregon plants that will be the anchors of the back yard.

Acer circinatum, vine maple. Good fall color, Oregon native, and less expensive than Japanese maple

Acer circinatum, vine maple. Good fall color, Oregon native, and less expensive than Japanese maple

Mahonia x media “Winter Sun” Oregon grape. We learned after the fact that despite having “Oregon” in the name, this is a relative of the native Oregon grape that’s from China. Regardless, hummingbirds love it and it looks great to boot.

Mahonia x media “Winter Sun” Oregon grape. We learned after the fact that despite having “Oregon” in the name, this is a relative of the native Oregon grape that’s from China. Regardless, hummingbirds love it and it looks great to boot.

Cornus sericea “Isanti” red twig dogwood.

Cornus sericea “Isanti” red twig dogwood.

Ribes sanguineum, flowering red currant

Ribes sanguineum, flowering red currant

Yuzu! not a native, but the best citrus for our climate. Is supposed to be hardy to 0 degrees F.

Yuzu! not a native, but the best citrus for our climate. Is supposed to be hardy to 0 degrees F.

And that’s where we are! Getting really excited for year two and all the fun of watching the plants from last year grow and adding new ones wherever we can find space.


Digging, Dividing, and Storing Dahlias

This week, we saw the first frost. Tuesday had a very light frost, and then Wednesday a more substantial one. Ever since my tulip bulbs arrived in the mail, I’ve been eagerly awaiting frost so that I could pull out the dahlias and plant the tulips in their place. The dahlias did so well this year, filling our house with bouquets of cut flowers and garnering many comments from neighbors and passers-by.

Sources:

Fundamentals of Growing Dahlias (American Dahlia Society)

Digging, dividing, and storing tubers (American Dahlia Society)

Eden Brothers ("the seediest place on earth")

Swan Island Dahlias

Dahlias on Wikipedia

You can see the varieties we grew this year in the slideshow above. This is our third year growing dahlias. It started rather simply with just a single dahlia, Grayval Shiraz, bought on a whim at the nursery. After we had 4+ months of bountiful burgundy blooms, it was hard not to want to plant more the second year. We expanded to 4 varieties. This year, we are up to 8. I have three new ones to try out next year that I’ve already pre-ordered!

Dahlias are native to Mexico and are the national flower of Mexico. The Aztecs used their tubers for food. I haven’t tried eating one, but I’ve read that they aren’t that flavorful. The description of how they are after cooking sounds similar to poi.

The first frost will kill the leaves that are exposed to the frost, rendering the plants very sad-looking. They were already struggling a bit with end-of-season powdery mildew, so it was definitely time to move on.

First, on Tuesday, I cut all the plants down.

Dig

I left enough stem to make the clumps easy to handle.

I left enough stem to make the clumps easy to handle.

It’s important to dip your clippers in bleach solution between plants so that you don’t spread any disease.

It’s important to dip your clippers in bleach solution between plants so that you don’t spread any disease.

After cutting them all back to a few inches of stem, I let them sit overnight in order to encourage eyes to develop. Kind of like potatoes, dahlia tubers develop eyes, and it’s from these eyes that the stalks of next year’s plants will grow. When you divide, you want each tuber to have at least one eye. According to the guide linked above from the American Dahlia Society, letting them sit in the ground for a day or few after cutting back encourages eye growth. It seemed to work, as the eyes were easier to identify than they have been when I did this in past years.

Another thing the guide suggested was covering the exposed stalks with aluminum foil to prevent water from building up in the stalks. I was only going to let them sit one night, and it was anticipated to be a dry night, so I skipped this step. It was fine for all the plants save one—the Grayval Shiraz—which did have a lot of water in it when I went to divide, and showed signs of rot where the water had been. So, in the future, I’ll be taking this advice.
The next day, I carefully dug up each clump, gently knocking off some dirt in the process, but saving the intense dirt removal until after they had a couple of hours to dry out and firm up some.

Here you can see the clump for one of our most impressive varieties, KA’s Cloud, a huge white-pink dinnerplate.

Here you can see the clump for one of our most impressive varieties, KA’s Cloud, a huge white-pink dinnerplate.

After letting the clumps air dry a bit, I carefully removed them to the back yard where I was going to do the work of cleaning and dividing them. It’s very important at this stage to keep track of which is which! You can see below that I used blue painters tape to label each clump.

IMG_3289.jpg

The next step is to remove as much soil as possible, and for this I sprayed them with the hose. Then, I went through and trimmed off all of the thin, spidery roots. These aren’t needed for storage, and cleaning them up makes it easier to identify and separate the tubers.

Here you can see a cleaned and trimmed clump from the Moonlight Sonata dinnerplate variety.

Here you can see a cleaned and trimmed clump from the Moonlight Sonata dinnerplate variety.

At this point, I took an overnight break. It wasn’t supposed to freeze, but I covered them with plastic just in case.

The next afternoon, I sat down with my trusty shears and bleach dip to prepare to divide. The bleach dip is supposed to help prevent transferring a virus from one dahlia to the next. I’m not sure if any of my dahlias had this virus, but in this age of pandemic, it seemed better to be safe than sorry.

The first thing I would do for each clump was cut off as much stem as I could.

Divide

Clump sans stem

Clump sans stem

Remember to keep track of which clump you are working on! It would be a shame to go to all this trouble and then just have a random grab bag of tubers when you go to plant next year.

The next step was to remove all of the tubers that don’t have a chance. Some of them are too small, too skinny, or have an overly-thin neck.

In my experience, tubers with a thin neck don’t survive well. The neck is too easy to snap, separating the eyes from the rest of the tuber.

In my experience, tubers with a thin neck don’t survive well. The neck is too easy to snap, separating the eyes from the rest of the tuber.

In addition to tubers that won’t be easy to store and plant, we want to skip over the “mother” tuber. I got this term from the guide written by the American Dahlia Society, and I wasn’t sure what it meant at first. But once I started dividing, I noticed each clump had one tuber that didn’t have the same shape as the others, and it tended to have a clump of roots growing off of the non-business-end. I decided these were the mothers—they tended to be central to the clump and just had a maternal vibe.

One gnarly mother.

One gnarly mother.

So we’ve talked about which parts of the clump we don’t want, but how do we pick out a tuber we do want?

Well, we want some of the “crown” which is the lump of flesh in the center of the clump, just below where the stems end, and this is where new shoots come from, where we can find eyes.

You want to try to leave some crown for the other tubers, while also getting a good chunk for each of them. Each tuber will have a fat bottom, a neck (but not too skinny) and then a piece of crown with an eye.

At this stage you may not always be able to identify the eye. Here’s a clear example of an easy-to-clock one:

Not the easiest thing to photograph, but here is a raised nubbin that will become a sprout next year.

Not the easiest thing to photograph, but here is a raised nubbin that will become a sprout next year.

Sometimes, you may have two or more tubers that aren’t so easy to separate. It’s okay to store a couple of tubers attached to a piece of crown—it’s okay to just store entire clumps if you want. It just means that you’ll have fewer opportunities to grow your dahlia patch through multiplication. On my precious KA’s cloud, there just weren’t many tubers to begin with, and I was afraid of losing an eye (theirs, not mine) by dividing two tubers that didn’t have a lot of crown to spare, so I just stored them in a mini clump. I paid $25 for that tuber this year, so I didn’t want to risk not having any at all next year!

After dividing comes storage

Store

You want to store your dahlias in a way that keeps them from rotting and also doesn’t make them sprout too early. This means controlling moisture and temperature. The first year, I just wrapped the tubers in saran wrap and put them in a plastic clamshell (like the kind pre-washed salad greens come in) and put them in the basement. That worked pretty well.

The next year I decided to try being fancier, and I bought pearlite and stored them in that in black plastic pots (the kind plants come in from the nursery) one per variety. This did not go so well. First, the pearlite was too fine, dusty, and messy. I tried putting down coco or newspaper to keep the pearlite from running out of the drainage holes in the pots, but the pots still left a trail of pearlite whenever they were moved. Also, this proved to be far too dry, with many of my tubers withered up and no longer viable the next spring.

This year, I read the guide from the American Dahlia Society (linked at the top of this post) and they suggested large vermiculite or wood shavings. The day I went to shop for supplies, the local garden store was closed but the local pet store was open, so I went in to buy the wood shavings they sell for rodent bedding. I also grabbed some doggie poop bags to separate my varieties into. Turns out the bedding just looked like wood shavings as I shopped hurriedly (as one does in a pandemic) and was actually soft shredded paper. So my fingers are crossed that this is just as good!

First, I laid a layer of the bedding in a bag.

Layer of bedding.

Layer of bedding.

Then, add a layer of dahlias.

Night, night, little dahlias!

Night, night, little dahlias!

I also snipped some small holes in the bags to let them breathe.

Then, I added a tape label to the outside of the bag, gently closed the bag (no tape or tie, to make it easier to check on them through the winter) and laid them all in a large storage bin like so.

IMG_3346.jpg

Then, I snapped the lid onto the bin, and slid it back into the crawlspace under the house.

So, the bedding keeps it dry, the bags keep from getting too dry, the slits in the bag let them breathe, and the plastic bin keeps the whole thing somewhat moisture-locked so that they don’t dry out totally or get sodden from winter humidity. And, I hope that the temperature in the crawlspace is such that they hang out in a nice little stasis for the next 6-7 months.

I plan to check on them periodically (the guide says monthly) to remove any that seem to be rotting so that the rot doesn’t spread.

I’ll plan to post some updates as the storage season progresses!

Fuchsia and ferns for the backyard

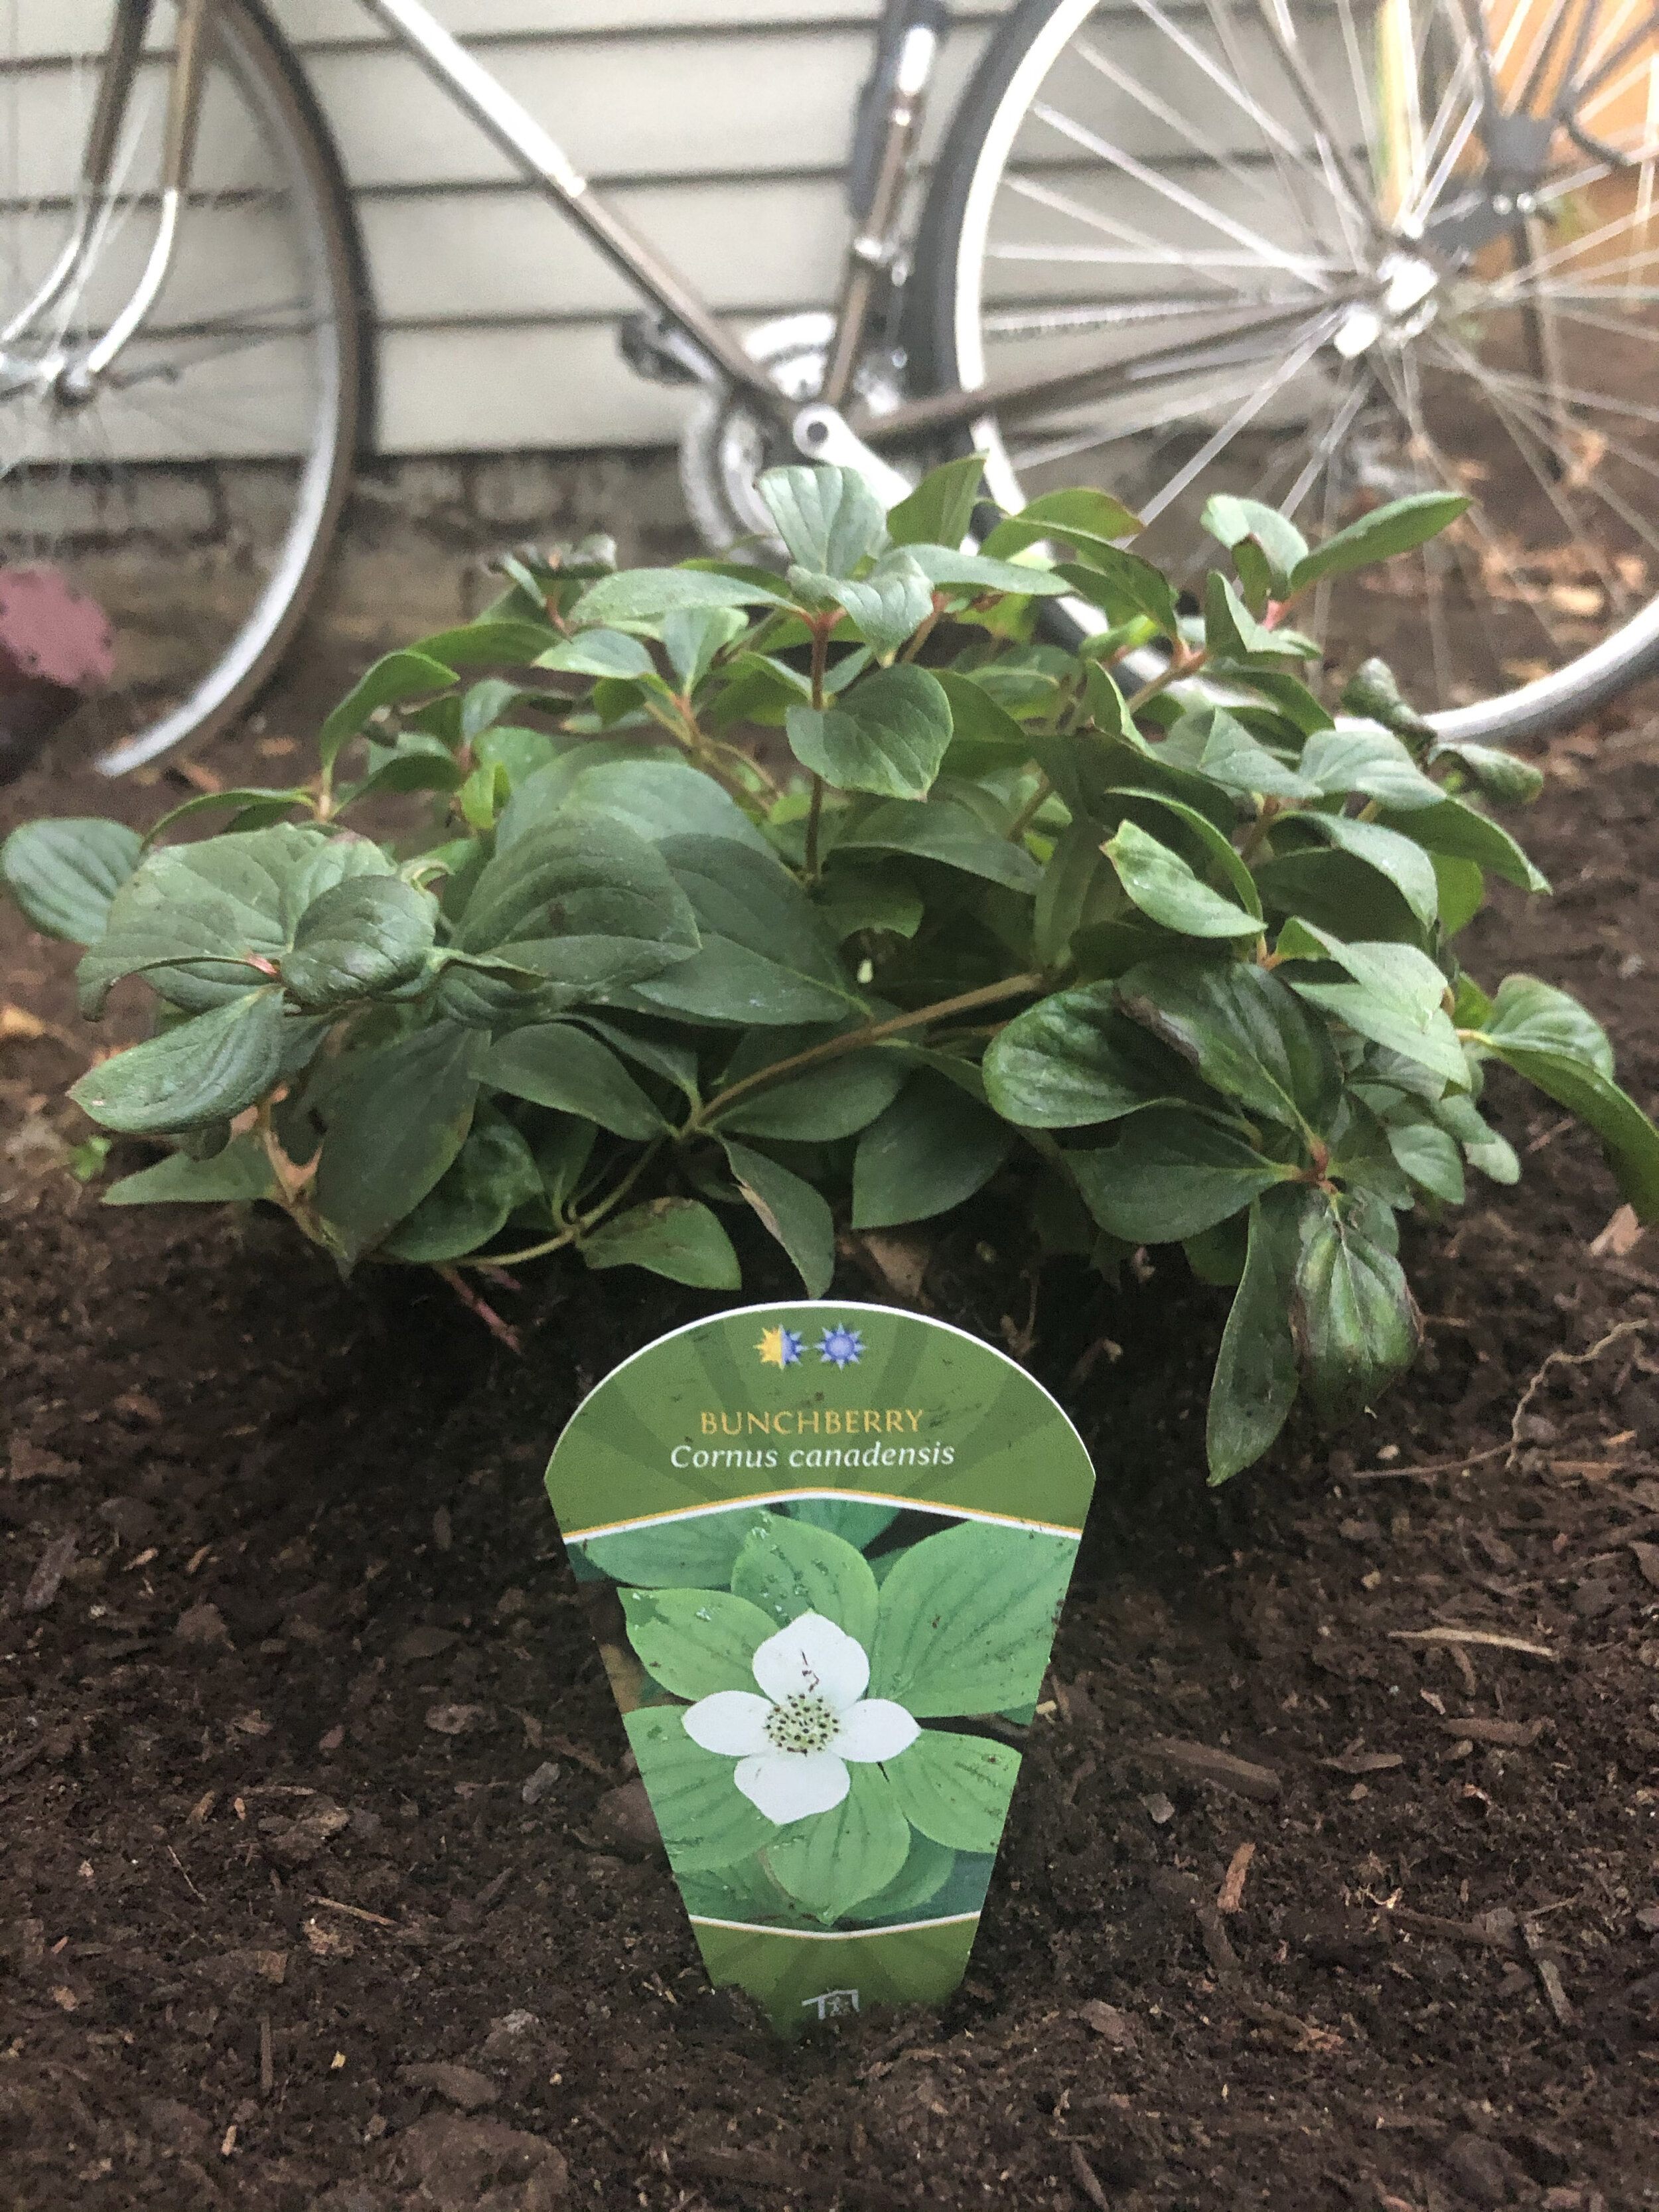
This first year in our new house, we established the front yard pretty well, but there are sections in our backyard that need some love. We want to make the space more inviting to birds and pollinators, and so we’ve purchased some fuchsia, ferns, and bunchberry to enliven a few sections. Near the house, where it’s a little shady, we have a hummingbird feeder and rose bush. Hopefully the hummingbirds will enjoy the Fuchsia Golden Herald and the Fuchsia Debrons Black Cherry I planted nearby. I also added two ferns and a bunchberry bush; it’s the start of a cute little space! The bunchberry was an impulse buy. It’s native and only grows a foot high, and I hope it provides nice ground cover for beneficial insects.

Good ol’ Barry made us a pot stand, too. I planted a Fuchsia Debron’s Smokey Blues and hope to see the blooms cascade down the sides next year. It towers over pots filled with sage, thyme, and mint.

We bought two wine barrels at Portland Nursery and need to drill drainage holes in them. They smelled like a wet dog mixed with fermenting wine. We drove home with the windows open, breathing through our mouth. Eventually the smell became somewhat tolerable and started reminding me of old dogs and wine bars. I kind of miss the smell now…

Experiment: Direct Sow vs Transplant

We will use one of our beds for winter greens grown under plastic row cover (here’s the post on making the hoops to support the cover). In the spirit of the scientific method, we’re trying to start these plants two ways: direct sowing in the bed, and starting seeds in trays that then later are transplanted.

Today’s inspiration and sources:

Grow Cook Eat (Irish gardening TV show)

Botanical Interests seeds


I started with a plastic tray for the seeds.

It comes with a tray beneath to provide stability and catch water.

It comes with a tray beneath to provide stability and catch water.

Next, I piled the planting compost into it, letting it heap up.

We don’t want the compost to compact, so we just dump it in without stuffing.

We don’t want the compost to compact, so we just dump it in without stuffing.

Then, and this technique I learned from Michael on Grow Gook Eat, we use a stick to even off the top of the compost in a sawing motion. This allows for a flat top without compacting..

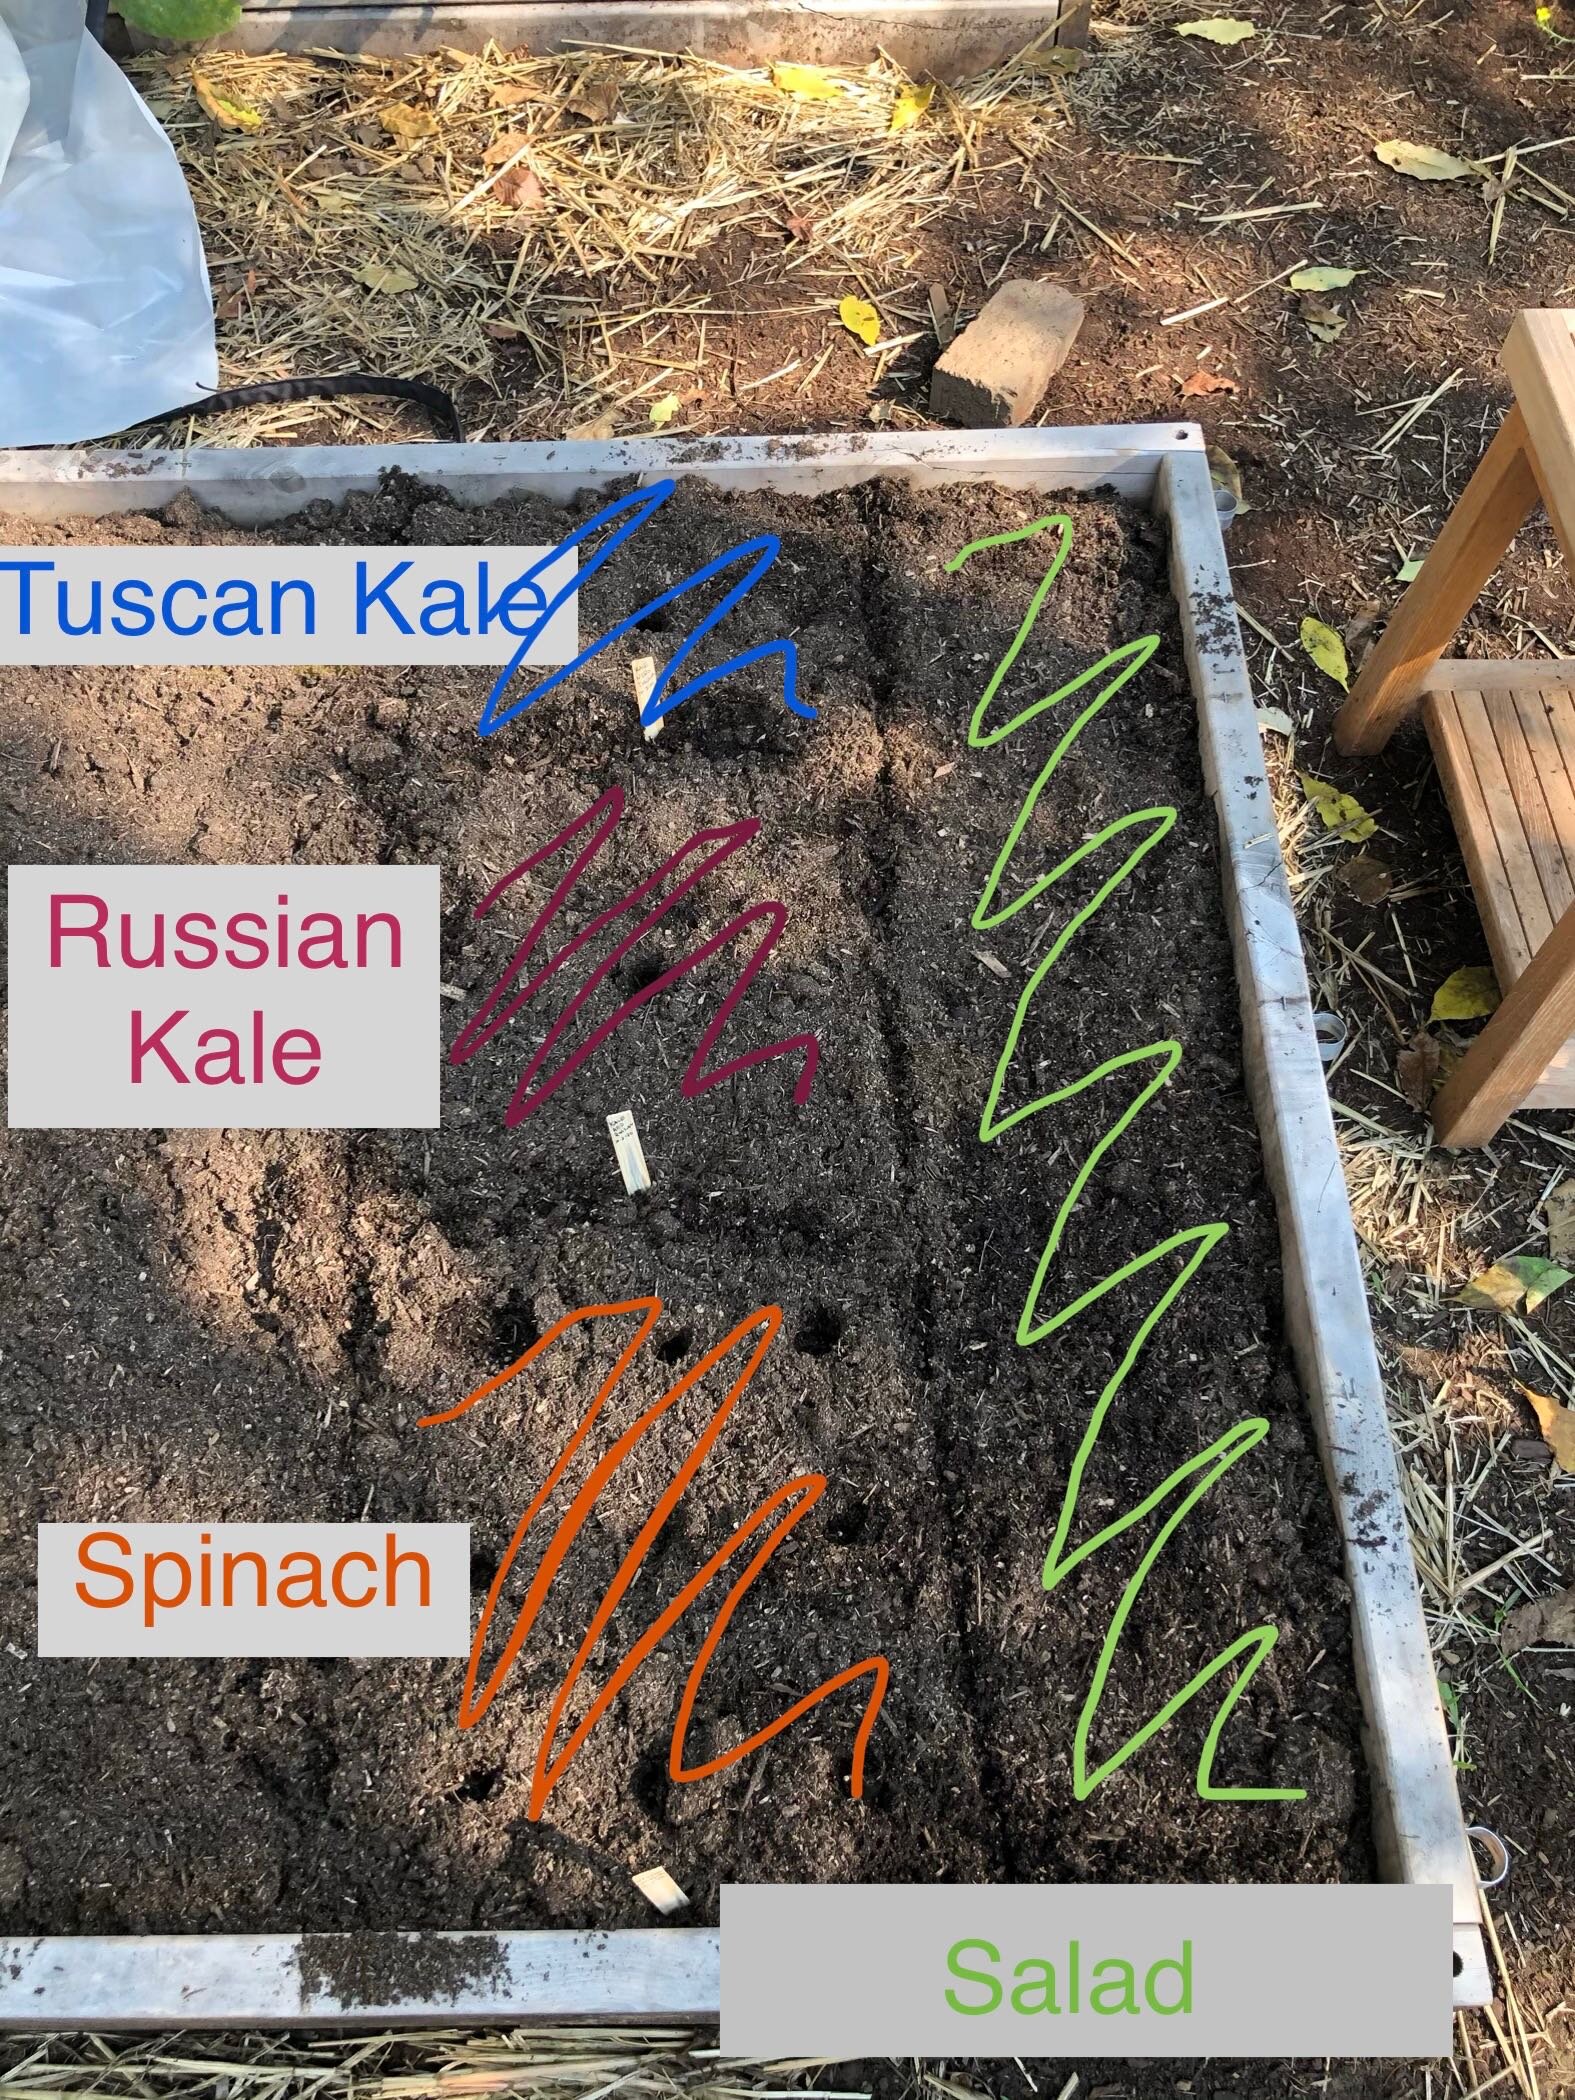
Next, time to add some seeds. Planting a lettuce mix that did really well over the summer in a shaded bed, along with spinach (which bolted immediately when we planted it in June), and two types of kale that have done very well for us already.

Made holes with my finger before dropping in seeds for the spinach and kales.

Made holes with my finger before dropping in seeds for the spinach and kales.

After filling the little holes with seeds, and sprinkling the lettuce seeds over the top of their section, I added more compost over the top, sawed again (careful not to scrape off the shallowly sown lettuce seeds), added tags, and gave it a good water.

For the other half of the experiment, I took the empty bed, added a nice layer of compost on top, and planted like so.

The left half of the bed, not really pictured, is where I’ll transplant the ones started in the seed tray.

The left half of the bed, not really pictured, is where I’ll transplant the ones started in the seed tray.

And that’s it! We’ll check back in a few weeks to see how they are doing. I think the biggest variable is that this bed is kind of shady with our cherry tree (which we hope to slowly reduce to a manageable size over the next few years), and I can put the seed trays in the sunny part of the yard. On the other hand, the lettuce seed packet says they don’t recommend transplanting, so we’ll see what matters more—sun or following the directions on the packet.


After this work in the garden yesterday, we attended the お月見 (O-Tsukimi) or moon viewing event at the Portland Japanese Garden. We, along with a masked and socially-distant group of other attendees, watched as the moon rose through the haze from the California wildfires. It was blood red at first, and then faded to jack-o-lantern orange. The moon itself defied photography, but I did capture the special raking of the gravel in the garden for this festival. The checkerboard pattern is meant to remind one of rice paddies, and is a nod to the fall harvest origins of the moon viewing festival in Japan.

We were told that it takes them two days to rake this pattern, and it’s only done once a year.

We were told that it takes them two days to rake this pattern, and it’s only done once a year.

Allium yum-yum

It’s October, and here in the Pacific Northwest, that means time to plan alliums for spring eatin’!

At least, that’s what I read (this is still my first year doing all this).

Today’s inspirations and sources of information:

>Tilth Alliance Maritime Northwest Garden Guide

>Portland Nursery Onion info sheet

>Portland Nursery Garlic info sheet

>Oregonian article “It’s time to plant garlic”

>Charles Dowding and his “no dig” method


I started in my raised bed that is currently home to two zucchini plants.

Baby onions tucked under the zucchini leaves.

Baby onions tucked under the zucchini leaves.

I had been thinking very linearly—must finish the zucchini before I dare plant anything else in the same bed. But then, watching one of Charles Dowding’s videos (linked above) the idea of succession sowing finally sunk in. I decided to follow the crop rotation mnemonic I learned from the Maritime Northwest Garden Guide (“Leaf, Root, Flower, Fruit”) and follow my zucchini (fruit) with garlic and onions (leaf for their high nitrogen needs), all while my zucchini are still in the twilight of their lives.

First, I cleared away all the straw that I had been using as mulch. This straw was a total bust: it was full of seeds, so it was actually hay, meaning I was basically planting grass seed in my beds. Also, although I can’t be sure, I think maybe the straw is what brought on the root aphids that led us to dig up an entire bed in late August. We keep saying “this is the last straw!”

I found more root aphids, I think, when I cleared away the straw today, but I’ve decided that I’m not fighting, I’m moving forward. So, I pulled back the straw, scraped off the most aphidy soil, and dressed the top with a few inches of E.B. Stone Planting Compost, from Portland Nursery.

Then, I started laying out garlic cloves and onion sets. Here are the varieties we used (also from Portland Nursery):

Don’t worry, those prices are per pound. Although, I did not know that until checkout. I was fully prepared to pay $50 for two cloves of garlic!

Here’s how I arranged the garlic:

You can learn more about the difference between the two neck types in the links at the top of the post.

You can learn more about the difference between the two neck types in the links at the top of the post.

I tucked in the onions like so:

One of the red onions was already rotten, so only 5 to plant.

One of the red onions was already rotten, so only 5 to plant.

Those are my little hand-written tags, let’s hope the ink survives the winter rains.

I might even have some room to squeeze in a few more next to the yellow onions. Maybe I’ll go pick up some shallots tomorrow…


While he wasn’t singing about garlic and onions, the title of the post makes me think of this Nile Rogers tune.

Harvest: 9-29-2020

Today we harvested one tomato, some very small onions, and a handful of green beans.

I think the onions needed more sun! I had a dream last week that I waited a little longer and they swelled to the size of softballs. Alas, only a dream.

Cloches for raised beds

As we head into fall and winter, we wanted to make some hoops for our raised beds.

Last weekend, armed with knowledge from YouTube (here’s the most helpful video we found) we headed off to Hankins Hardware to get supplies:

3 PVC pipes: 10 feet long, 1/2 inch diameter

12 tube straps: 3/4” size

24 screws: #6, 1 inch long

For each end of each PVC pipe, we put two of the tube straps to help keep them more stable.

Two 3/4” tube straps holding the PVC hoop in place

Two 3/4” tube straps holding the PVC hoop in place

We repeated the process and put three hoops on our 4ft by 4ft raised bed.

Three PVC hoops on a 4ft by 4ft raised bed

Three PVC hoops on a 4ft by 4ft raised bed

This is the height of the hoops with the full 10ft of PVC. This is a good height for established plants, and we’ll likely use this length to help overwinter our already mature kale plants. However, for the other bed where we want to start some small salad greens, we will cut the PVC to make shorter hoops, keeping the warmth closer to the soil—at least that’s how we hope it works!

Useful tool for cutting PVC

Useful tool for cutting PVC

Cut a foot off of each end of the PVC hoop, and it dropped the height of the hoop by about a foot.

Hoop in front is an 8ft. length of PVC, while two in rear are 10ft.

Hoop in front is an 8ft. length of PVC, while two in rear are 10ft.

Overall, a fun, easy project. Total cost for one bed is less than $25 (exclusive of tools). Will update when we have one planted and covered for winter.

Sunflowers

Our new hobby is staring out the window. Our sunflowers grow fast, all over 9 feet tall. Birds sit on top of the drooping spent blooms, reaching under to peck at the sides of the sunflower. “It’s like a natural bird feeder,” Jon muses. Yesterday, a squirrel watched transfixed from a telephone poll, waiting for his turn. Inside, we scolded him as he furiously gnawed on our sunflowers.

Screen Shot 2020-09-15 at 3.05.31 PM.png